
Vinyl plank flooring is a popular choice for homeowners who want the appearance of natural wood without the maintenance requirements of traditional hardwood. It is available in a wide range of colors, textures, and designs, and many products are designed for straightforward DIY installation. However, even a seemingly simple flooring project can go wrong when important preparation steps are overlooked.
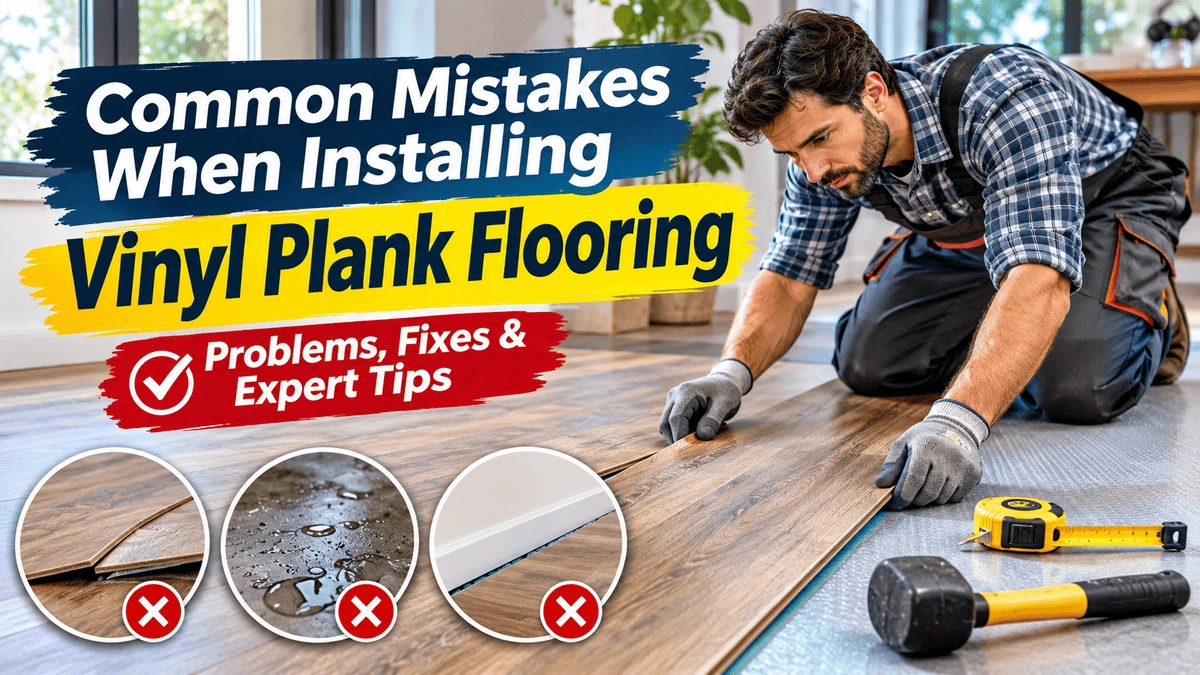
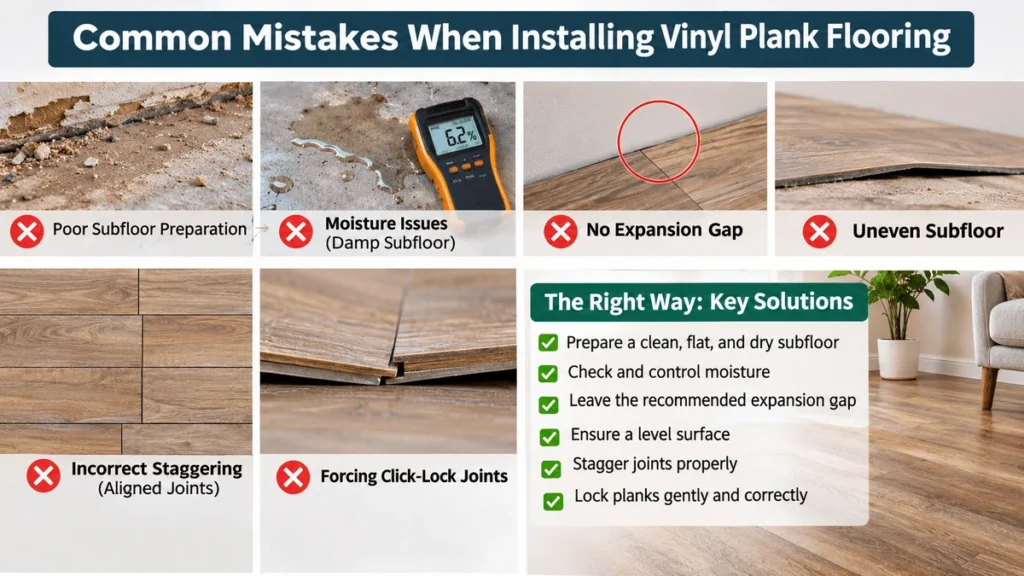
The common mistakes when installing vinyl plank flooring include failing to prepare the subfloor, ignoring moisture problems, skipping required acclimation, leaving insufficient expansion space, and incorrectly locking the planks together. These errors can cause visible gaps, buckling, uneven surfaces, damaged joints, and premature flooring failure.
The good news is that most installation problems can be prevented with careful planning and the right techniques. Whether you are installing luxury vinyl plank (LVP) flooring for the first time or hiring a professional installer, understanding these mistakes can help you achieve a cleaner finish and a more durable floor.
In this guide, you will learn about the 15 most common vinyl plank flooring installation mistakes, why they happen, how to fix them, and what you can do to prevent them.
Why Do Vinyl Plank Flooring Installation Mistakes Happen?
Vinyl plank flooring is designed to be practical and durable, but successful installation depends on more than simply connecting individual planks. The condition of the subfloor, the installation method, room temperature, moisture levels, and manufacturer requirements all influence the final result.
For example, an uneven subfloor can place excessive stress on click-lock joints. Insufficient expansion space can restrict the movement of a floating floor. Similarly, adding an incompatible underlayment may make the floor too flexible and cause the locking mechanisms to fail.
Some problems appear immediately, while others develop weeks or months after installation.
The most effective approach is to identify potential problems before laying the first plank rather than trying to repair an entire floor later.
1. Skipping Proper Subfloor Preparation
One of the biggest mistakes when installing vinyl plank flooring is failing to prepare the subfloor properly.
Vinyl planks need a clean, stable, dry, and sufficiently flat surface. Installing them over loose debris, protruding nails, old adhesive, cracks, or uneven areas can interfere with the flooring system.
Why is this a problem?
Small imperfections beneath the planks may cause several issues:
- Planks may rock or move when someone walks over them.
- Click-lock joints may separate or break.
- Uneven areas may create hollow sounds or soft spots.
- High points can cause excessive wear on the flooring.
- Debris may create visible bumps beneath thin vinyl products.
Even if the finished floor initially looks attractive, an improperly prepared subfloor can shorten its service life.
How to fix it
Before installation, remove dust, dirt, loose materials, and other debris. Secure loose sections of a wooden subfloor and address protruding fasteners. Repair cracks and depressions with a suitable patching or leveling compound.
Use a long straightedge or level to check the surface for high and low spots. Follow the flooring manufacturer’s flatness tolerances rather than assuming that a surface is acceptable because it looks level.
Allow all repair products to cure fully before installing the flooring.
Prevention tip: Spend sufficient time preparing the subfloor. Correcting surface problems before installation is generally easier and less expensive than repairing damaged joints or removing finished flooring later.
2. Ignoring Moisture Problems Beneath the Floor
Another serious mistake is installing vinyl plank flooring over a damp subfloor without checking the source of the moisture.
Vinyl flooring products are often marketed as waterproof, but this does not mean the entire floor assembly is protected from moisture damage.
Water can still affect the subfloor, contribute to mold growth in susceptible materials, weaken adhesives, or create problems beneath the flooring.
Why does moisture cause problems?
Moisture may come from several sources, including:
- Water vapor passing through a concrete slab.
- Plumbing leaks beneath or near the flooring.
- Water entering through exterior walls or doors.
- Damp wooden subfloors or crawl spaces.
- Inadequate drainage around the building.
A floating vinyl floor may conceal moisture problems until unpleasant odors, discoloration, or damage to surrounding materials becomes noticeable.
How to fix it
First, identify and correct the source of moisture. Test concrete subfloors using the method and limits specified by the flooring manufacturer. Check wooden subfloors for signs of dampness, rot, or structural deterioration.
Install an approved moisture barrier or vapor retarder only when the product’s installation instructions and the subfloor conditions require one. Not every vinyl flooring system uses the same moisture-control method.
If the subfloor is persistently damp or a leak has caused extensive damage, resolve the problem before installing the new floor.
Prevention tip: Never assume that waterproof vinyl planks eliminate the need for subfloor moisture testing.
3. Skipping Acclimation or Temperature Conditioning
Some installers open the boxes and immediately begin laying vinyl planks without checking the manufacturer’s conditioning requirements.
Depending on the product, vinyl flooring may need time to adjust to the installation environment. Temperature changes can affect plank dimensions and the behavior of the flooring system.
However, acclimation requirements vary. Some rigid-core products have different requirements from flexible vinyl planks or glue-down flooring.
What happens when this step is skipped?
Installing flooring outside the permitted environmental conditions can contribute to:
- Gaps between planks.
- Buckling or lifting.
- Difficulty engaging click-lock joints.
- Changes in the appearance of seams.
- Problems with adhesive performance.
These symptoms can also result from other installation errors, so acclimation should not automatically be assumed to be the only cause.
How to fix it
Read the installation instructions before opening the boxes. Follow the specified storage position, room temperature, conditioning period, and other environmental requirements.
If the manufacturer requires 48 hours of acclimation, for example, provide that time before installation. Do not treat 48 hours as a universal requirement for every vinyl flooring product.
Maintain the recommended conditions during installation and for the specified period afterward.
Prevention tip: Check the product instructions before scheduling the installation. Proper conditioning is especially important when flooring has been stored in a much hotter or colder environment than the installation room.
4. Forgetting to Leave the Required Expansion Gap
A frequent mistake with floating vinyl plank flooring is installing the planks too tightly against the walls, door frames, pipes, or other fixed objects.
Many floating flooring systems require a perimeter expansion gap that allows the installed floor to accommodate dimensional changes.
Why is an expansion gap important?
When the floor cannot move as designed, pressure may build up against the surrounding structures. Depending on the product and installation conditions, this can cause raised edges, buckling, or separation between joints.
The gap also needs to be maintained around relevant fixed objects and transitions, not just along the longest wall.
How to fix it
Use spacers to maintain the expansion clearance specified by the manufacturer. For some products, the required gap is approximately 1/4 inch, but the correct dimension depends on the flooring system and installation conditions.
Check the clearance around walls, door jambs, pipes, and other obstructions before completing the installation.
Cover the perimeter gap with compatible baseboards or trim. Attach the trim to the wall rather than fastening it through a floating floor in a way that restricts movement.
Prevention tip: Inspect the expansion gap before reinstalling the baseboards. Once the trim is in place, it can be difficult to notice areas where the floor has become trapped.
5. Installing Vinyl Planks Over an Uneven Floor
Subfloor preparation and surface flatness are closely related, but it is worth treating this as a separate mistake because an apparently solid floor may still have unacceptable dips and high spots.
A subfloor can be structurally sound without being sufficiently flat for vinyl plank installation.
What problems can an uneven floor cause?
When planks bridge depressions or rest on high spots, they may flex under normal foot traffic. Repeated movement can put stress on the joints and lead to gaps, clicking noises, or broken locking edges.
Some thin vinyl products may also reveal surface imperfections through the finished flooring.
How to fix it
Check the entire installation area with an appropriate straightedge. Mark areas that fall outside the product’s specified tolerances.
Use compatible leveling products to fill depressions and appropriate methods to correct high spots. For wooden subfloors, ensure that panels are securely fastened and that the surface is suitable for the selected flooring.
Do not use additional underlayment as a substitute for correcting significant unevenness.
Prevention tip: Check doorways, room transitions, and areas near walls carefully. These locations can contain uneven sections that are easy to miss when inspecting only the center of the room.
6. Using the Wrong Underlayment
Adding an extra underlayment may seem like an easy way to make a vinyl floor softer, quieter, or more comfortable. However, this can create problems if the flooring already has an attached pad or is designed to be installed directly over an approved substrate.
Why is incorrect underlayment a mistake?
An incompatible or excessively soft underlayment can allow the planks to move too much under pressure. This additional movement may weaken click-lock joints, cause unevenness, or affect the manufacturer’s warranty.
Some installations require specific underlayment or moisture-control products, while others prohibit additional cushioning.
How to fix it
Check whether the vinyl planks have an attached backing pad. Read the installation instructions to determine whether another underlayment is permitted.
If an underlayment is required, select one approved for the specific flooring product and subfloor. Do not assume that an underlayment intended for laminate flooring is automatically suitable for vinyl planks.
Prevention tip: Choose underlayment based on the manufacturer’s specifications, not simply on thickness, price, or advertised sound reduction.
7. Installing the Planks in the Wrong Direction
Plank direction can influence how spacious a room appears and how noticeable the seams are.
Although there is no single correct direction for every room, failing to plan the layout can result in an awkward appearance or unnecessary cutting.
How does plank direction affect the result?
Running planks across a narrow hallway, for example, may create a different visual effect from running them along its length. The direction of natural light, room proportions, doorways, and adjoining spaces may also influence the finished appearance.
Changing direction between rooms may require transition profiles or a product-specific installation detail.
How to fix it
Before installing the first row, examine the room from its main entrance and consider the direction of the longest wall and natural light.
Lay out a few rows without permanently connecting them to evaluate the appearance. For open-plan spaces, consider how the flooring direction will look across adjoining areas.
Check the manufacturer’s instructions for any restrictions involving layout, transitions, or changes in installation direction.
Prevention tip: Plan the flooring direction before cutting any planks. A short dry layout can prevent unnecessary waste and help create a more consistent visual flow.
8. Failing to Stagger the End Joints Properly
Vinyl planks often have visible short-end joints where individual boards meet. If these joints line up in neighboring rows, the floor can develop a repetitive, grid-like appearance.
Poor joint placement may also conflict with the flooring manufacturer’s installation requirements.
What is the correct way to stagger vinyl planks?
Staggering means positioning the end joints in adjacent rows at different locations rather than aligning them repeatedly.
Many products specify a minimum distance between neighboring end joints. The required distance varies by product, so a fixed measurement should not be applied to every flooring system.
How to fix it
Plan the starting length of each row before installation. Use offcuts where appropriate, provided they meet the manufacturer’s minimum plank-length and joint-spacing requirements.
Avoid creating a repeated stair-step pattern or placing end joints too close together. Also avoid H-joints, where joints in alternating rows align in a conspicuous pattern.
Prevention tip: Check several completed rows before continuing across the room. Correcting a joint pattern early is much easier than dismantling a large section of finished flooring.
9. Not Mixing Planks From Different Boxes
Vinyl planks that imitate wood may feature different knots, grain patterns, shades, and surface details. If every plank is taken from one box before opening another, similar designs may end up grouped together.
This can make the floor look artificial or uneven in color.
How to prevent visible pattern repetition
Open several boxes and compare the plank designs before beginning. Mix boards from different boxes as you work, following any instructions supplied with the product.
Spread distinctive grain patterns and shades throughout the room instead of concentrating similar designs in one area.
Before installation, inspect each plank for visible defects. Do not install damaged boards simply because they are already included in the box.
Prevention tip: Arrange a few planks on the floor and view them from different angles before locking them together. This allows you to identify obvious repetitions and make adjustments early.
10. Forcing the Click-Lock Joints Together
Many luxury vinyl plank flooring products use click-lock systems designed to connect the planks without adhesive. However, these joints must be engaged using the correct angle and technique.
Forcing a plank into position or striking its edge directly with a hammer can damage the locking mechanism.
What happens when joints are damaged?
Damaged locking edges may fail to hold the planks together securely. Gaps can develop, and the floor may become more vulnerable to movement under normal use.
A joint that appears closed from above may also be incorrectly engaged.
How to fix it
Follow the manufacturer’s specified installation sequence. Align the plank carefully, engage the joint at the recommended angle, and lower or lock it into place as directed.
Use a compatible tapping block and rubber mallet only when the installation system permits them. Never strike the exposed locking edge directly.
If a locking mechanism is visibly broken, replace the plank rather than relying on force to make the joint stay together.
Prevention tip: Practice connecting a few spare planks before starting the main installation. This helps you understand the locking system and reduces the risk of damaging expensive flooring materials.
11. Cutting Planks Incorrectly Around Doorways and Pipes
Door frames, heating or plumbing pipes, corners, and irregular walls can make vinyl plank installation more challenging.
Rushed or inaccurate cuts may leave large gaps, exposed edges, or poorly fitted trim.
Why does this mistake happen?
Installers sometimes measure only once, cut without checking the orientation of the plank, or forget to account for the required clearance around fixed objects.
Cutting every plank to fit tightly around an obstruction can also restrict movement where the flooring system requires clearance.
How to fix it
Measure each opening carefully and transfer the measurements to the plank. Double-check the position and direction of the cut before using a utility knife, jigsaw, or other suitable tool.
For doorways, undercutting the door jamb or casing may create a cleaner finish if the construction and product instructions permit it. Leave the required clearance around fixed objects.
Use suitable trim or compatible finishing components to cover visible perimeter gaps without trapping a floating floor.
Prevention tip: Make a cardboard template for complicated cuts. This can be particularly useful around pipes and irregular door frames, where mistakes can waste an entire plank.
12. Planning the First and Last Rows Poorly
Starting with a full-width plank without calculating the remaining space can leave a very narrow strip along the opposite wall.
A thin final row can be difficult to cut and position, and it may look unbalanced.
How to avoid a narrow final row
Measure the room’s width and calculate how much space remains after accounting for the first row and the required perimeter clearances.
If the final row would be too narrow, adjust the width of the first row to produce a more balanced layout. Follow the manufacturer’s minimum permitted plank width and cutting requirements.
Also consider the room’s shape, doorway positions, and any visible transitions before deciding where the first row should begin.
Prevention tip: Dry-fit the first few rows and calculate the final row before applying adhesive or committing to the click-lock layout.
13. Installing Over an Unsuitable Existing Floor
Some vinyl plank products can be installed over certain existing floor coverings, but others require removal of the old flooring.
Installing over an unsuitable surface can create instability or cause existing imperfections to show through the new floor.
Which surfaces can cause problems?
Potentially unsuitable surfaces include loose carpeting, soft or cushioned flooring, badly damaged tiles, unstable wooden boards, and surfaces with significant height differences.
The presence of old adhesive, moisture damage, or incompatible coatings can also affect the installation.
Older resilient flooring requires special care because some materials may contain asbestos. Sanding, scraping, or removing suspected asbestos-containing flooring can release hazardous fibers.
How to fix it
Check the flooring manufacturer’s approved substrate list. Remove unsuitable coverings and repair the underlying surface as required.
If older flooring or adhesive may contain asbestos, do not disturb it until the material has been appropriately assessed. Consult a qualified asbestos professional when necessary.
Prevention tip: Determine whether the existing floor is a suitable substrate before purchasing materials or starting demolition.
14. Rushing the Installation and Skipping Quality Checks
Trying to finish a flooring project quickly can lead to measurement errors, poorly engaged joints, incorrect cuts, and missed expansion gaps.
Even small mistakes can become harder to correct as more rows are installed.
How to prevent installation errors
Work in manageable sections and inspect each row before moving on. Check that the long and short joints are fully engaged, the rows remain straight, and the required spacing is maintained.
Remove debris from joints as necessary, and replace damaged planks rather than attempting to hide the damage.
Keep tools organized and avoid rushing difficult cuts around corners or doorways.
Prevention tip: Pause after every few rows to inspect the floor from different angles. Correcting alignment problems early can save substantial time later.
15. Ignoring Manufacturer Instructions and Warranty Requirements
One of the most avoidable mistakes is assuming that every vinyl plank flooring product can be installed in exactly the same way.
Installation methods vary among floating click-lock flooring, glue-down planks, and loose-lay systems. Requirements can also differ by product construction and intended application.
Why are manufacturer instructions important?
The instructions may specify:
- Approved subfloor materials and flatness tolerances.
- Moisture-testing methods and acceptable results.
- Temperature and acclimation requirements.
- Required expansion clearances.
- Approved underlayment and adhesive.
- Installation methods around cabinets and fixed objects.
- Cleaning, maintenance, and warranty conditions.
Ignoring these requirements can cause installation failure or affect warranty coverage.
How to avoid this mistake
Obtain the installation guide for the exact product you purchased. Read it before preparing the subfloor, and keep a copy available throughout the installation.
If the instructions conflict with general advice found online, follow the applicable product-specific requirements or ask the manufacturer for clarification.
Prevention tip: Keep the product name, installation guide, purchase receipt, and any moisture-test records together. These documents can be useful if an installation or warranty issue arises later.
How to Fix Common Vinyl Plank Flooring Problems After Installation
If you have already installed your floor and notice a problem, identify the likely cause before attempting a repair.
| Problem | Possible cause | Recommended action |
|---|---|---|
| Gaps between planks | Incorrect joint engagement, movement, or environmental changes | Inspect the joints and room conditions; reinstall affected planks if necessary. |
| Buckling or raised sections | Restricted movement, temperature changes, or substrate problems | Check expansion clearances and the manufacturer’s repair instructions. |
| Hollow sounds | Subfloor irregularities or voids beneath the flooring | Inspect the substrate and determine whether affected sections need to be lifted. |
| Broken click-lock edges | Damaged joints or excessive force during installation | Replace damaged planks and correct the installation technique. |
| Uneven plank surfaces | High or low spots in the subfloor | Correct the substrate and reinstall affected sections where necessary. |
| Visible color patches | Similar plank patterns grouped together | Rebalance the appearance with suitable replacement planks where practical. |
| Lifting near doorways | Restricted movement, unsuitable transitions, or incorrect cuts | Inspect the transition and clearance around the affected area. |
These symptoms can have more than one cause. For example, gaps may result from damaged joints, an uneven subfloor, or environmental changes. Avoid forcing planks back into position until you understand why the problem developed.
For widespread buckling, persistent moisture, or repeated joint failure, consider consulting a qualified flooring professional.
Essential Tools for a Successful Vinyl Plank Flooring Installation
Using appropriate tools makes it easier to measure accurately, prepare the subfloor, and connect the planks without damaging them.
Commonly useful tools include:
- Tape measure for measuring rooms, doorways, and individual cuts.
- Pencil and straightedge for marking cutting lines.
- Utility knife or suitable saw for cutting the selected flooring product.
- Long level or straightedge for checking subfloor flatness.
- Vacuum and cleaning supplies for removing debris.
- Spacers for maintaining the required perimeter clearance.
- Manufacturer-approved tapping block and pull bar, when appropriate.
- Knee pads and suitable protective equipment.
- Moisture-testing equipment where required by the product instructions.
Not every installation requires every tool. Select equipment according to the flooring system, substrate, and complexity of the room.
Final Checklist Before Installing Vinyl Plank Flooring
Use this checklist before beginning the installation.
- Read the installation instructions for the exact flooring product.
- Confirm that the existing subfloor is approved, stable, clean, dry, and sufficiently flat.
- Complete any required moisture tests and address moisture sources.
- Meet the specified room temperature and acclimation requirements.
- Confirm whether additional underlayment or a moisture barrier is permitted or required.
- Inspect the planks and mix boards from different boxes where appropriate.
- Plan the plank direction and the first and last rows.
- Confirm the required expansion clearances and joint-staggering rules.
- Prepare tools for accurate cuts around doorways and pipes.
- Inspect each row before continuing.
- Check transitions, trim, and other details without restricting floor movement.
- Keep the installation guide and warranty documentation.
Completing these checks before installation can help reduce avoidable errors and improve the finished appearance of your floor.
Frequently Asked Questions
What is the most common mistake when installing vinyl plank flooring?
Poor subfloor preparation is one of the most common mistakes. A dirty, uneven, unstable, or damp substrate can contribute to gaps, movement, damaged joints, and other flooring problems. Checking the substrate before installation is one of the most effective ways to prevent these issues.
Why are my vinyl plank floors separating after installation?
Separation can occur when joints are not fully engaged, the subfloor is uneven, the planks were installed outside the required environmental conditions, or the flooring system is moving improperly. Inspect the affected joints and review the manufacturer’s instructions before deciding whether to reinstall the planks.
Do vinyl planks need an expansion gap around the walls?
Many floating vinyl plank flooring systems require a perimeter expansion gap, but the exact clearance depends on the product and installation conditions. Follow the manufacturer’s instructions and maintain the required space around walls, door frames, and other fixed objects.
Do vinyl planks need to acclimate before installation?
Some vinyl plank products require acclimation or other forms of temperature conditioning, while others have different requirements. Check the specific installation guide for the required conditioning period, storage method, and temperature range.
Can vinyl plank flooring be installed over an uneven subfloor?
Only if the surface meets the flooring manufacturer’s flatness and substrate requirements. Significant high and low spots should be corrected before installation because they can cause movement, visible imperfections, or damage to the locking joints.
Should I use additional underlayment beneath vinyl plank flooring?
Not always. Some vinyl planks include an attached backing pad, and adding another layer may be prohibited. Use additional underlayment only when it is compatible with and approved for the particular flooring system.
Why does my vinyl plank flooring make clicking or popping sounds?
Clicking or popping sounds may result from an uneven subfloor, movement at the joints, trapped debris, restricted expansion, or other installation problems. Identify the source before attempting a repair, especially if the noise occurs alongside visible gaps or lifting.
Can I install vinyl plank flooring over concrete?
Many vinyl plank products can be installed over concrete when the slab meets the manufacturer’s substrate, flatness, and moisture requirements. Moisture testing and any required moisture-control measures should be completed before installation.
Can I repair vinyl plank flooring without replacing the entire floor?
Yes, some localized problems can be repaired by removing and reinstalling affected planks or replacing damaged boards. However, widespread buckling, extensive joint damage, or subfloor moisture problems may require more substantial work.
How can I make my vinyl plank flooring installation last longer?
Prepare the subfloor correctly, follow the product’s environmental and installation requirements, protect the locking joints, maintain the required clearances, and use compatible cleaning products. Regularly inspect the floor for leaks, unusual movement, and other early signs of damage.
Conclusion
Avoiding the common mistakes when installing vinyl plank flooring begins with careful preparation and attention to the manufacturer’s instructions. A clean, flat, stable, and dry subfloor provides the foundation for a successful installation, while correct joint engagement, appropriate expansion clearances, and careful layout help prevent many common problems.
Do not rush the process or assume that every vinyl flooring product follows identical installation rules. Taking the time to plan the layout, inspect the planks, and check each row can help you achieve a professional-looking result and reduce the likelihood of expensive repairs.
Whether you choose a DIY installation or hire an experienced flooring installer, the key is to address potential problems before they become hidden beneath the finished floor.