
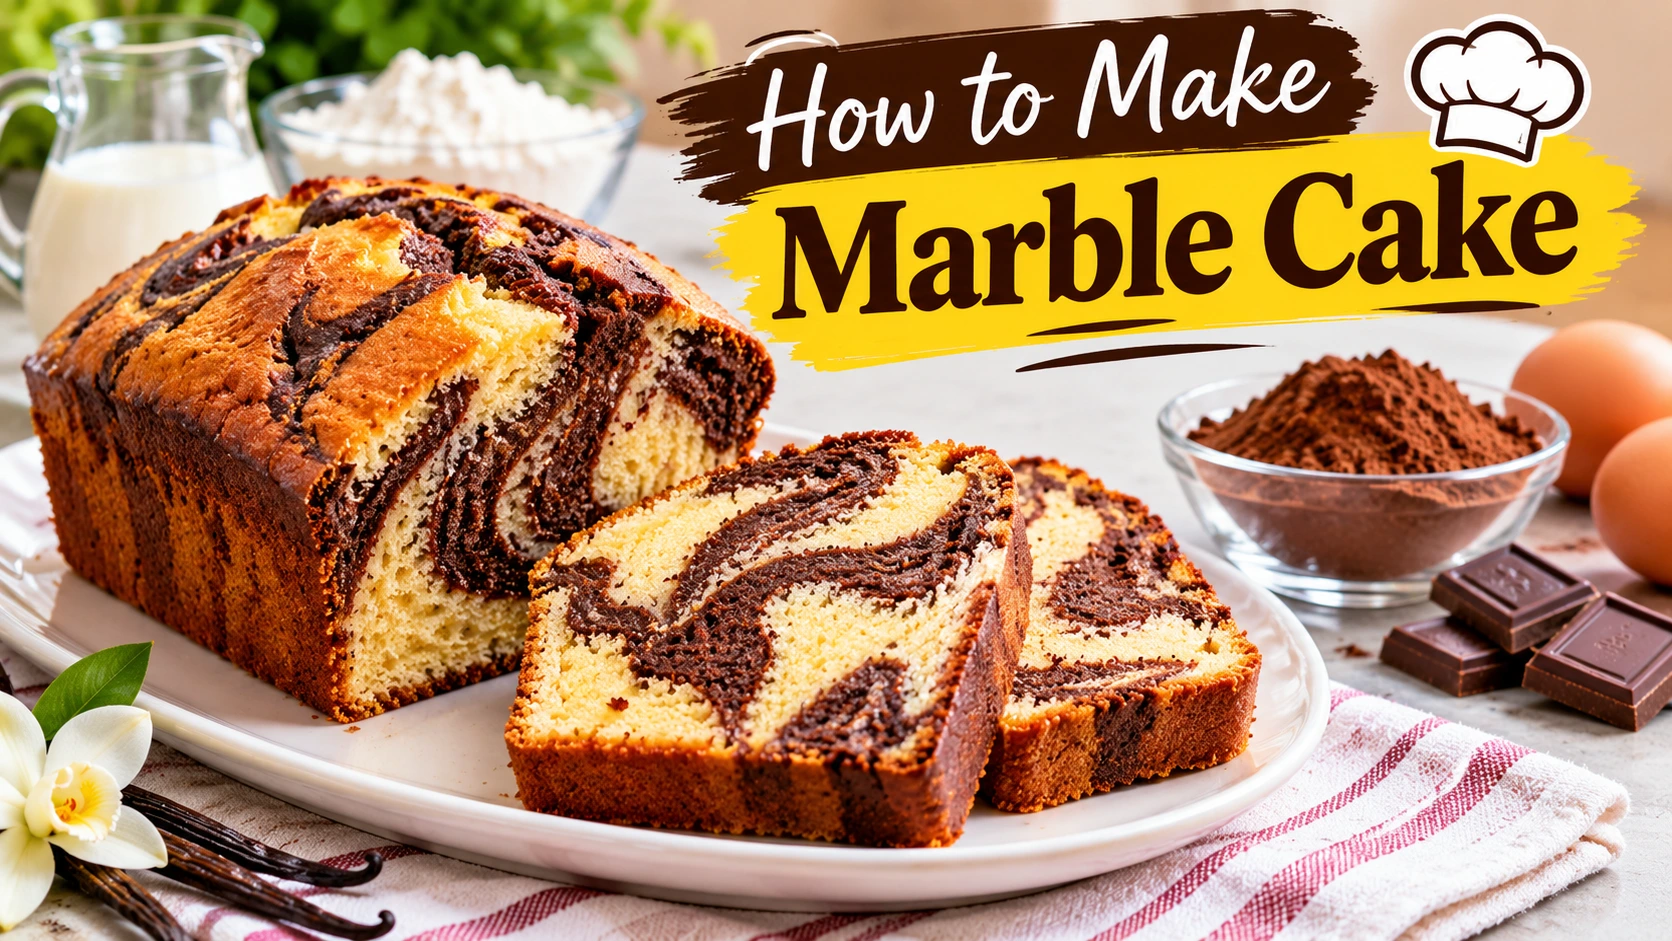
Learning how to make marble cake at home is easier than you might think. This classic cake combines two delicious flavours—vanilla and chocolate—in one soft, moist dessert. Its beautiful swirled pattern resembles natural marble, making it an attractive treat for birthdays, afternoon tea, family gatherings, and other special occasions.
Unlike heavily decorated cakes, a traditional marble cake does not need elaborate frosting or complicated decorations. Its appeal comes from the combination of a buttery vanilla cake and rich chocolate swirls in every slice. With a few everyday baking ingredients and some simple techniques, you can prepare a homemade marble cake that looks impressive and tastes delicious.
In this guide, you will learn how to make marble cake from scratch, including the ingredients, preparation steps, baking temperature, swirling technique, and practical tips for achieving a soft and evenly baked result.
What Is Marble Cake?
Marble cake is a type of cake made by combining two different batters, usually vanilla and chocolate, in the same baking pan. The batters are gently swirled together before baking to create a distinctive pattern that resembles marble stone.
The cake is commonly associated with German baking traditions and became popular in the United States through German immigrant communities. Early versions used ingredients such as molasses or spices to create contrasting colours. Chocolate later became a popular way to produce the darker swirls found in many modern marble cake recipes.
Today, marble cake is enjoyed in many countries, with different variations featuring butter, oil, sour cream, yoghurt, or other ingredients. The classic chocolate-and-vanilla combination remains a favourite because it offers two familiar flavours in one dessert.
Why You’ll Love This Homemade Marble Cake Recipe
This homemade marble cake is a convenient choice for beginner and experienced bakers alike. It uses simple ingredients and does not require specialist baking equipment.
- Two flavours in one cake: Enjoy the combination of chocolate and vanilla in every slice.
- Simple ingredients: Most of the ingredients are common kitchen staples.
- Attractive appearance: The chocolate swirls create a beautiful pattern without complicated decoration.
- Versatile dessert: Serve it with tea, coffee, milk, or your favourite dessert topping.
- Beginner-friendly method: The preparation involves straightforward mixing, layering, and baking steps.
- Easy to customise: You can experiment with different flavours, toppings, and serving suggestions.
Marble Cake Recipe: Preparation Time and Servings
Before gathering your ingredients, review the preparation details so you can plan your baking time.
- Servings: 8–10 slices
- Preparation time: Approximately 20 minutes
- Baking time: Approximately 35–45 minutes
- Cooling time: Approximately 30–45 minutes
- Oven temperature: 180°C (350°F)
- Pan size: One 20 cm (8-inch) round cake pan
- Difficulty: Easy
Ingredients for Homemade Marble Cake
To make a delicious chocolate and vanilla marble cake, prepare the following ingredients. Measuring them accurately is important for achieving the right cake texture and consistency.
Ingredients for the Vanilla Cake Batter
- 2 cups (approximately 250 g) all-purpose flour
- 1 cup (200 g) granulated sugar
- 1/2 cup (113 g) unsalted butter, softened
- 2 large eggs at room temperature
- 3/4 cup (180 ml) milk at room temperature
- 2 teaspoons baking powder
- 1 teaspoon pure vanilla extract
- 1/2 teaspoon salt
- Butter or cooking spray for greasing the cake pan
Ingredients for the Chocolate Batter
- 2 tablespoons unsweetened cocoa powder
- 1–2 tablespoons milk, if needed to adjust the consistency
Use unsweetened cocoa powder rather than sweetened drinking chocolate. This helps create a balanced chocolate flavour without adding unnecessary sugar.
How to Make Marble Cake Step by Step
Once you have prepared all the ingredients, you can start making your marble cake. Follow these steps carefully to create a soft cake with an attractive chocolate-and-vanilla pattern.
Step 1: Preheat the Oven and Prepare the Cake Pan
Preheat your oven to 180°C (350°F). Allow the oven to reach the correct temperature before placing the cake inside.
Take a 20 cm (8-inch) round cake pan and grease its base and sides with butter or cooking spray. You can also line the bottom with parchment paper to make removing the baked cake easier.
Preparing the pan properly helps prevent the cake from sticking and makes it easier to transfer the finished dessert to a serving plate.
Step 2: Combine the Dry Ingredients
Take a medium-sized bowl and add the all-purpose flour, baking powder, and salt. Whisk these ingredients together until evenly combined.
Sifting the flour and baking powder can help remove lumps and distribute the raising agent more evenly throughout the mixture. Set the bowl aside while you prepare the butter mixture.
Step 3: Cream the Butter and Sugar
Place the softened unsalted butter and granulated sugar in a large mixing bowl. Beat them together using an electric mixer or a hand whisk until the mixture becomes lighter in colour and creamy in texture.
This step helps incorporate air into the batter, contributing to a lighter cake texture. Make sure the butter is softened but not melted before mixing.
Step 4: Add the Eggs and Vanilla Extract
Add the eggs one at a time, beating after each addition until incorporated. Next, add the vanilla extract and mix briefly.
If the mixture looks slightly curdled, do not worry. It should come together when you add the dry ingredients and milk. Avoid overbeating the mixture at this stage.
Step 5: Combine the Dry Ingredients and Milk
Gradually add the flour mixture to the butter mixture, alternating with the milk. Begin and finish with the dry ingredients.
For example, add some flour mixture, followed by a portion of milk, and repeat until everything has been incorporated. Mix on low speed or fold gently with a spatula until you have a smooth batter.
Avoid mixing for too long. Excessive mixing can develop gluten in the flour and make the finished cake dense or tough.
Step 6: Divide the Batter and Add Cocoa Powder
Divide the prepared cake batter approximately equally between two separate bowls. Leave one portion as the vanilla batter.
Add the unsweetened cocoa powder to the second bowl. Fold gently until the cocoa is evenly distributed and the batter develops a rich chocolate colour.
If the chocolate batter becomes noticeably thicker than the vanilla batter, add one or two tablespoons of milk and mix gently. Both batters should have a reasonably similar consistency so they can be layered easily.
Step 7: Create the Marble Pattern
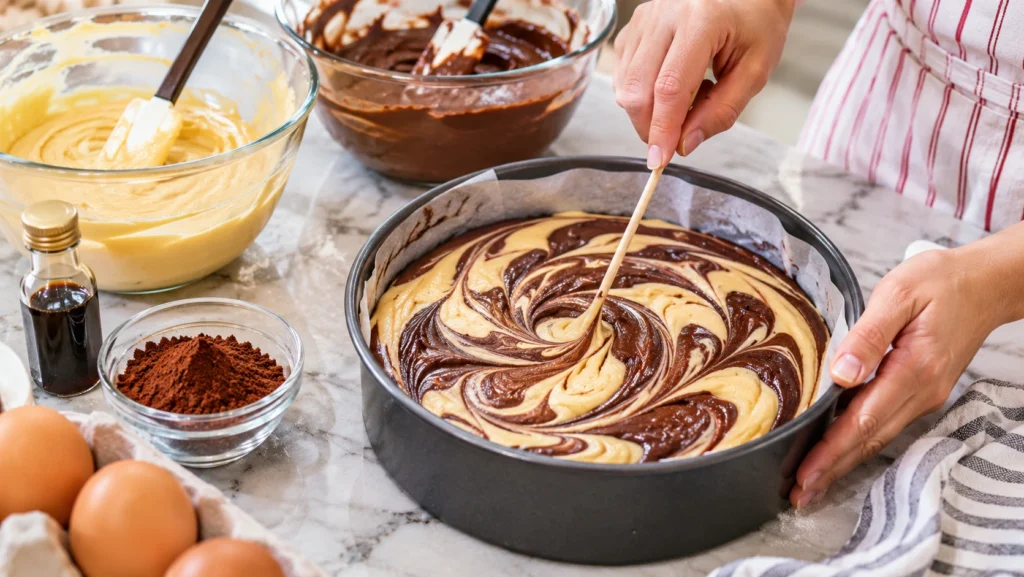
This is the most creative part of making a marble cake. Spoon alternating portions of vanilla and chocolate batter into the prepared cake pan.
Start with a spoonful of vanilla batter, followed by a spoonful of chocolate batter. Continue alternating the mixtures until both batters have been used.
Take a skewer, toothpick, or thin knife and gently move it through the batter in a few curved or figure-eight motions. This creates the characteristic marble pattern.
Important tip: Do not over-swirl the mixture. Too much mixing will blend the chocolate and vanilla batters together, reducing the contrast that creates the marble effect. A few gentle movements are enough.
Step 8: Remove Large Air Pockets
Once the batter is arranged in the pan, gently tap the pan against your kitchen counter once or twice. This can help release larger air pockets trapped in the mixture.
Do not tap the pan too forcefully because you want to preserve the marble pattern you have created.
Step 9: Bake the Marble Cake
Place the cake pan on the centre rack of your preheated oven. Bake at 180°C (350°F) for approximately 35–45 minutes.
Keep in mind that baking times can vary depending on your oven, cake pan, and batter depth. Avoid opening the oven door too early, as a sudden temperature change can interfere with the cake’s rising process.
To check whether the cake is ready, insert a toothpick or cake tester into the centre. If it comes out clean or with a few dry crumbs, the cake is generally ready. If wet batter sticks to it, continue baking and check again after a few minutes.
Step 10: Cool and Serve
Remove the cake from the oven and allow it to rest in the pan for approximately 10–15 minutes. Then carefully transfer it to a wire rack to cool completely.
Once cooled, cut the cake into slices to reveal the chocolate and vanilla swirls inside. Your homemade marble cake is now ready to serve.
Tips for Making a Soft and Moist Marble Cake
A beautiful marble pattern is only one part of a successful cake. The texture should also be soft, moist, and evenly baked. These practical tips can help improve your results.
- Use room-temperature ingredients: Room-temperature eggs, milk, and softened butter generally combine more easily and help create a smoother batter.
- Measure flour accurately: Too much flour can make the cake dry and dense. Use a kitchen scale where possible or measure flour without packing it into the cup.
- Do not melt the butter: Softened butter is better suited to creaming with sugar than fully melted butter in this recipe.
- Avoid overmixing: Mix until the ingredients are just combined to help maintain a tender texture.
- Use unsweetened cocoa powder: This provides a stronger chocolate flavour and allows you to control the sweetness.
- Do not over-swirl: Gentle movements create more defined chocolate and vanilla patterns.
- Preheat the oven properly: Starting with the correct oven temperature helps the cake bake more consistently.
- Check the centre for doneness: Do not rely on the top colour alone. Use a toothpick or cake tester to check the middle.
Common Marble Cake Mistakes and How to Avoid Them
Even a simple cake recipe can produce unexpected results if the ingredients or baking method are not balanced. Here are some common marble cake problems and practical ways to avoid them.
1. The Cake Is Too Dense
A dense cake may result from using too much flour, overmixing the batter, or using expired baking powder. Measure ingredients carefully and mix only until the batter is smooth and combined.
2. The Cake Is Dry
Overbaking is one of the common reasons a marble cake becomes dry. Check the cake near the end of the recommended baking time and remove it once a tester inserted into the centre comes out clean or with a few dry crumbs.
3. The Marble Pattern Is Not Visible
If the chocolate and vanilla batters are mixed too thoroughly, the cake may lose its distinctive pattern. Alternate the two batters in the pan and use only a few gentle swirling movements.
4. The Cake Sinks in the Middle
A cake that sinks in the centre may have been underbaked, mixed incorrectly, or prepared with too much raising agent. Opening the oven door too early can also affect the cake’s structure.
For more information, read our guide on why cakes sink in the middle and how to prevent it.
5. The Chocolate Batter Is Too Thick
Cocoa powder absorbs moisture, so adding it to the vanilla batter can make the chocolate portion thicker. Add a small amount of milk if necessary and mix gently until both batters have a similar consistency.
How to Store Homemade Marble Cake
Proper storage helps keep your homemade marble cake fresh and enjoyable after baking. Allow the cake to cool completely before storing it to prevent condensation from making the surface damp.
At Room Temperature
Store the cake in an airtight container at a cool room temperature for approximately 2–3 days. Keep it away from direct sunlight, heat, and moisture.
In the Refrigerator
If your kitchen is particularly warm or you need to keep the cake for longer, refrigeration is an option. Place it in an airtight container to prevent it from drying out or absorbing other food odours. Allow individual slices to return closer to room temperature before serving for a softer texture.
In the Freezer
Marble cake can also be frozen. Cut it into individual portions, wrap each piece securely, and place the portions in a freezer-safe container or bag. For best quality, use within approximately 2–3 months.
Thaw frozen slices in the refrigerator or at room temperature while still wrapped. Avoid repeatedly freezing and thawing the same cake portions.
Delicious Ways to Serve Marble Cake
One of the best things about marble cake is its versatility. It tastes delicious on its own, but you can also serve it with different toppings and accompaniments.
- With tea or coffee: A simple slice makes an excellent afternoon snack.
- With fresh berries: Strawberries, raspberries, and blueberries add a refreshing contrast.
- With whipped cream: A small amount of whipped cream creates a softer dessert experience.
- With chocolate sauce: Drizzle melted chocolate or chocolate sauce over the cake for a richer flavour.
- With ice cream: Serve a slice with vanilla ice cream for a classic dessert combination.
- With powdered sugar: Lightly dust the cooled cake with powdered sugar for a simple presentation.
Frequently Asked Questions About How to Make Marble Cake
1. What makes a marble cake different from a regular cake?
Marble cake combines two different cake batters, usually vanilla and chocolate, in one baking pan. The batters are gently swirled together to create a distinctive pattern that resembles marble stone. This gives the cake two flavours and an attractive appearance in every slice.
2. What ingredients do I need to make marble cake?
The main ingredients include all-purpose flour, sugar, butter, eggs, milk, baking powder, vanilla extract, salt, and unsweetened cocoa powder. These ingredients create the vanilla and chocolate batters that form the marble pattern.
3. How do you create the marble effect in a cake?
To create the marble effect, alternate spoonfuls of vanilla and chocolate batter in the prepared cake pan. Use a skewer, toothpick, or thin knife to make a few gentle swirling movements through the mixture. Avoid overmixing because it can blend the two colours together.
4. What temperature should I use to bake marble cake?
A typical homemade marble cake can be baked at 180°C (350°F) in a preheated oven. Baking time is generally around 35–45 minutes, although the exact time depends on the oven, cake pan, and batter depth. Always check the centre with a toothpick or cake tester before removing the cake.
5. How do I keep marble cake soft and moist?
Use accurately measured ingredients, softened butter, room-temperature eggs and milk, and avoid overmixing the batter. It is also important not to overbake the cake. Once cooled, store it in an airtight container to help maintain its moisture.
6. Can I make marble cake without an electric mixer?
Yes. You can make marble cake using a hand whisk, wooden spoon, and mixing bowls. Cream the softened butter and sugar thoroughly, add the eggs gradually, and mix the remaining ingredients gently. An electric mixer makes the process easier, but it is not essential.
7. Why does my marble cake become dense?
A dense marble cake can result from too much flour, overmixing, insufficient raising agent, or ingredients that were not measured accurately. Use fresh baking powder, measure the ingredients carefully, and mix the batter only until everything is combined.
8. Can I use oil instead of butter in marble cake?
Yes, some marble cake recipes use vegetable oil instead of butter. Oil can help produce a moist texture, but it changes the flavour and mixing method. Use a recipe specifically developed for oil rather than replacing butter with the same amount without adjusting the other ingredients.
9. How long does homemade marble cake stay fresh?
When stored in an airtight container in a cool room, homemade marble cake generally stays fresh for approximately 2–3 days. Refrigeration or freezing can extend its storage life, although refrigeration may make the texture firmer. Store it properly and check for any signs of spoilage before serving.
10. Can I add chocolate chips or nuts to marble cake?
Yes. You can add chocolate chips, chopped nuts, or other suitable ingredients to customise your marble cake. Fold them gently into the batter before placing it in the cake pan. Avoid adding too much because excessive extra ingredients can affect the cake’s texture and baking time.
Final Thoughts on Making Marble Cake
Making marble cake at home is a simple and enjoyable way to combine two classic flavours in one beautiful dessert. With basic ingredients, careful preparation, and a few gentle swirling movements, you can create a cake that looks impressive without requiring complicated decorating techniques.
Remember to measure your ingredients accurately, avoid overmixing the batter, use the correct oven temperature, and check that the centre is fully baked before removing the cake. These small details can make a noticeable difference to the final texture and appearance.
Whether you serve it with coffee, tea, fresh fruit, or a scoop of ice cream, homemade marble cake is a delicious dessert for everyday enjoyment and special occasions. Once you master this basic recipe, you can experiment with different flavours and ingredients to create your own version.
If baking is one of your favourite kitchen activities, keep exploring new recipes and techniques to expand your collection of homemade desserts.
Cakes are more than just desserts we eat to celebrate. They are part of culinary traditions and reflect the creativity of the people and cultures that developed them. If you are unable to bake a cake yourself or want to surprise someone with a sweet treat, there are also online bakeries that offer online cake delivery in Gurgaon or wherever you like. Explore the available options and enjoy trying different cake varieties.